程序员的世界有个不成文的约定,第一个程序先跑”hello world”,今天我们就在esp32上跑下hello world!
vs code配置
新建一个esp32-test文件夹,并在该文件夹下打开vs code:
1
2
| mkdir esp32-test
cd est32-test && code .
|
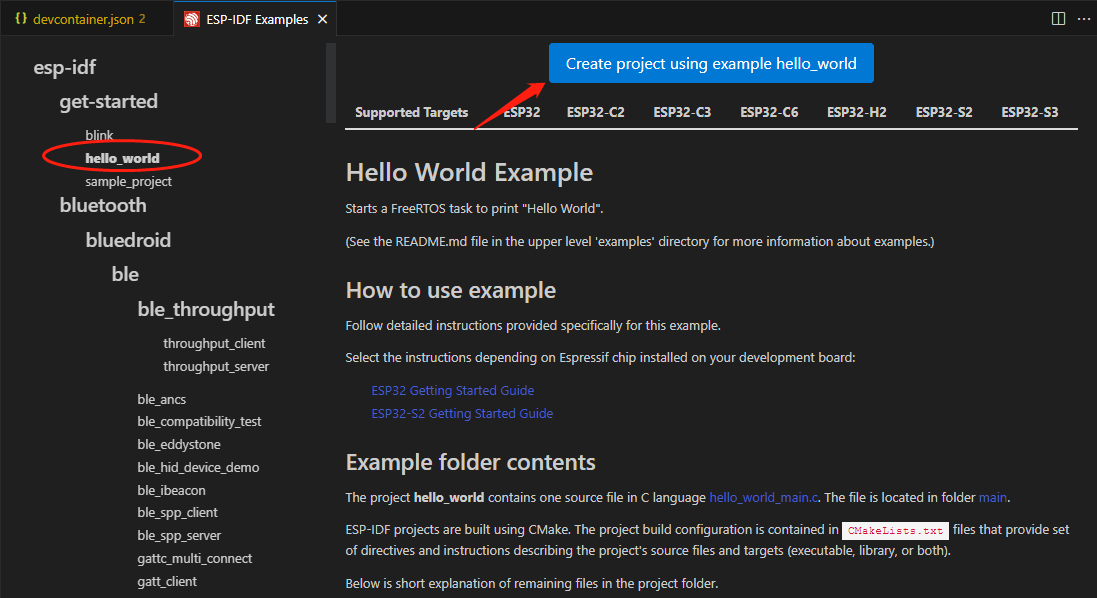
在vs code中打开命令面板,输入”esp show”:
![打开示例]()
![打开"hello_world"示例]()
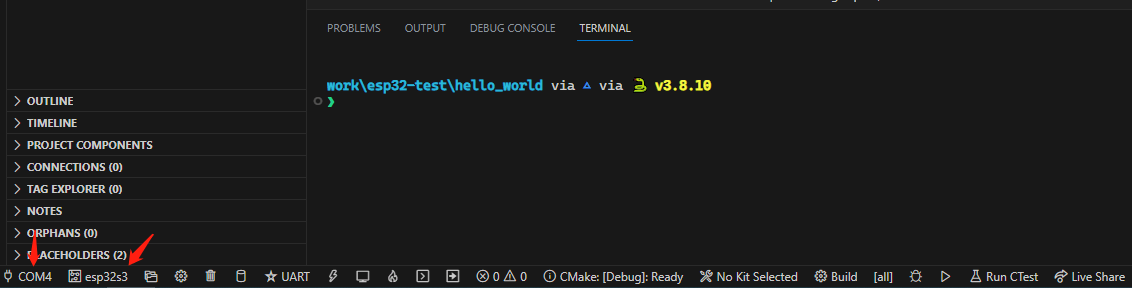
手上有一片esp32s3的板子,插上usb,在vs code左下角选择设备:
![连接esp32s3]()
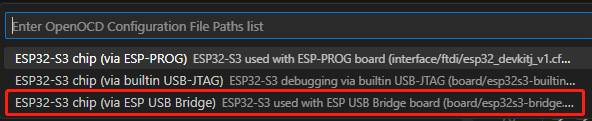
配置时要注意根据板子选择芯片型号和连接方式,我的板子上有usb转串口桥接芯片,所以选择bridge:
![配置连接方式]()
然后点击”build flash and monitor”:
“Hello world!”
源码
1
2
3
4
5
6
7
8
9
10
11
12
13
14
15
16
17
18
19
20
21
22
23
24
25
26
27
28
29
30
31
32
33
34
35
36
37
38
39
40
41
42
43
44
45
46
47
48
49
50
51
|
#include <stdio.h>
#include <inttypes.h>
#include "sdkconfig.h"
#include "freertos/FreeRTOS.h"
#include "freertos/task.h"
#include "esp_chip_info.h"
#include "esp_flash.h"
void app_main(void)
{
printf("Hello world!\n");
esp_chip_info_t chip_info;
uint32_t flash_size;
esp_chip_info(&chip_info);
printf("This is %s chip with %d CPU core(s), %s%s%s%s, ",
CONFIG_IDF_TARGET,
chip_info.cores,
(chip_info.features & CHIP_FEATURE_WIFI_BGN) ? "WiFi/" : "",
(chip_info.features & CHIP_FEATURE_BT) ? "BT" : "",
(chip_info.features & CHIP_FEATURE_BLE) ? "BLE" : "",
(chip_info.features & CHIP_FEATURE_IEEE802154) ? ", 802.15.4 (Zigbee/Thread)" : "");
unsigned major_rev = chip_info.revision / 100;
unsigned minor_rev = chip_info.revision % 100;
printf("silicon revision v%d.%d, ", major_rev, minor_rev);
if(esp_flash_get_size(NULL, &flash_size) != ESP_OK) {
printf("Get flash size failed");
return;
}
printf("%" PRIu32 "MB %s flash\n", flash_size / (uint32_t)(1024 * 1024),
(chip_info.features & CHIP_FEATURE_EMB_FLASH) ? "embedded" : "external");
printf("Minimum free heap size: %" PRIu32 " bytes\n", esp_get_minimum_free_heap_size());
for (int i = 10; i >= 0; i--) {
printf("Restarting in %d seconds...\n", i);
vTaskDelay(1000 / portTICK_PERIOD_MS);
}
printf("Restarting now.\n");
fflush(stdout);
esp_restart();
}
|
这段代码是一个简单的 ESP32 应用程序,它打印芯片信息并在延时后重新启动设备。
此代码包含以下要点:
#include:引用所需的头文件。
app_main 函数:这是应用程序的入口点。
printf 语句:打印 “Hello world!”,表示应用程序已启动。
esp_chip_info 函数:获取芯片信息并存储在 chip_info 变量中。
printf 语句:打印芯片信息,包括芯片型号、CPU 核心数、WiFi、蓝牙、BLE、802.15.4(Zigbee/Thread)支持、硅片修订版本、闪存容量等。
esp_flash_get_size 函数:获取闪存大小,并将结果存储在 flash_size 变量中。
printf 语句:打印闪存容量和闪存类型(嵌入式或外部)。
esp_get_minimum_free_heap_size 函数:获取最小可用堆空间大小。
printf 语句:打印最小可用堆空间大小。
for 循环:倒计时并打印剩余秒数,使用延时函数 vTaskDelay 实现延时。
printf 语句:打印 “Restarting now.” 表示设备将重新启动。
fflush 函数:刷新输出缓冲区,确保所有打印内容都被输出。
esp_restart 函数:重新启动设备。
这段代码演示了基本的 ESP32 应用程序结构,包括打印信息、获取芯片信息和闪存信息、计时器和重新启动设备。